
Appearance
Front Desk and Patient Info in the mobile app
Every visit in the app starts on Front Desk, where you pick the patient. Once a patient is open, the clinical menus appear and Patient Info holds their details.
Front Desk
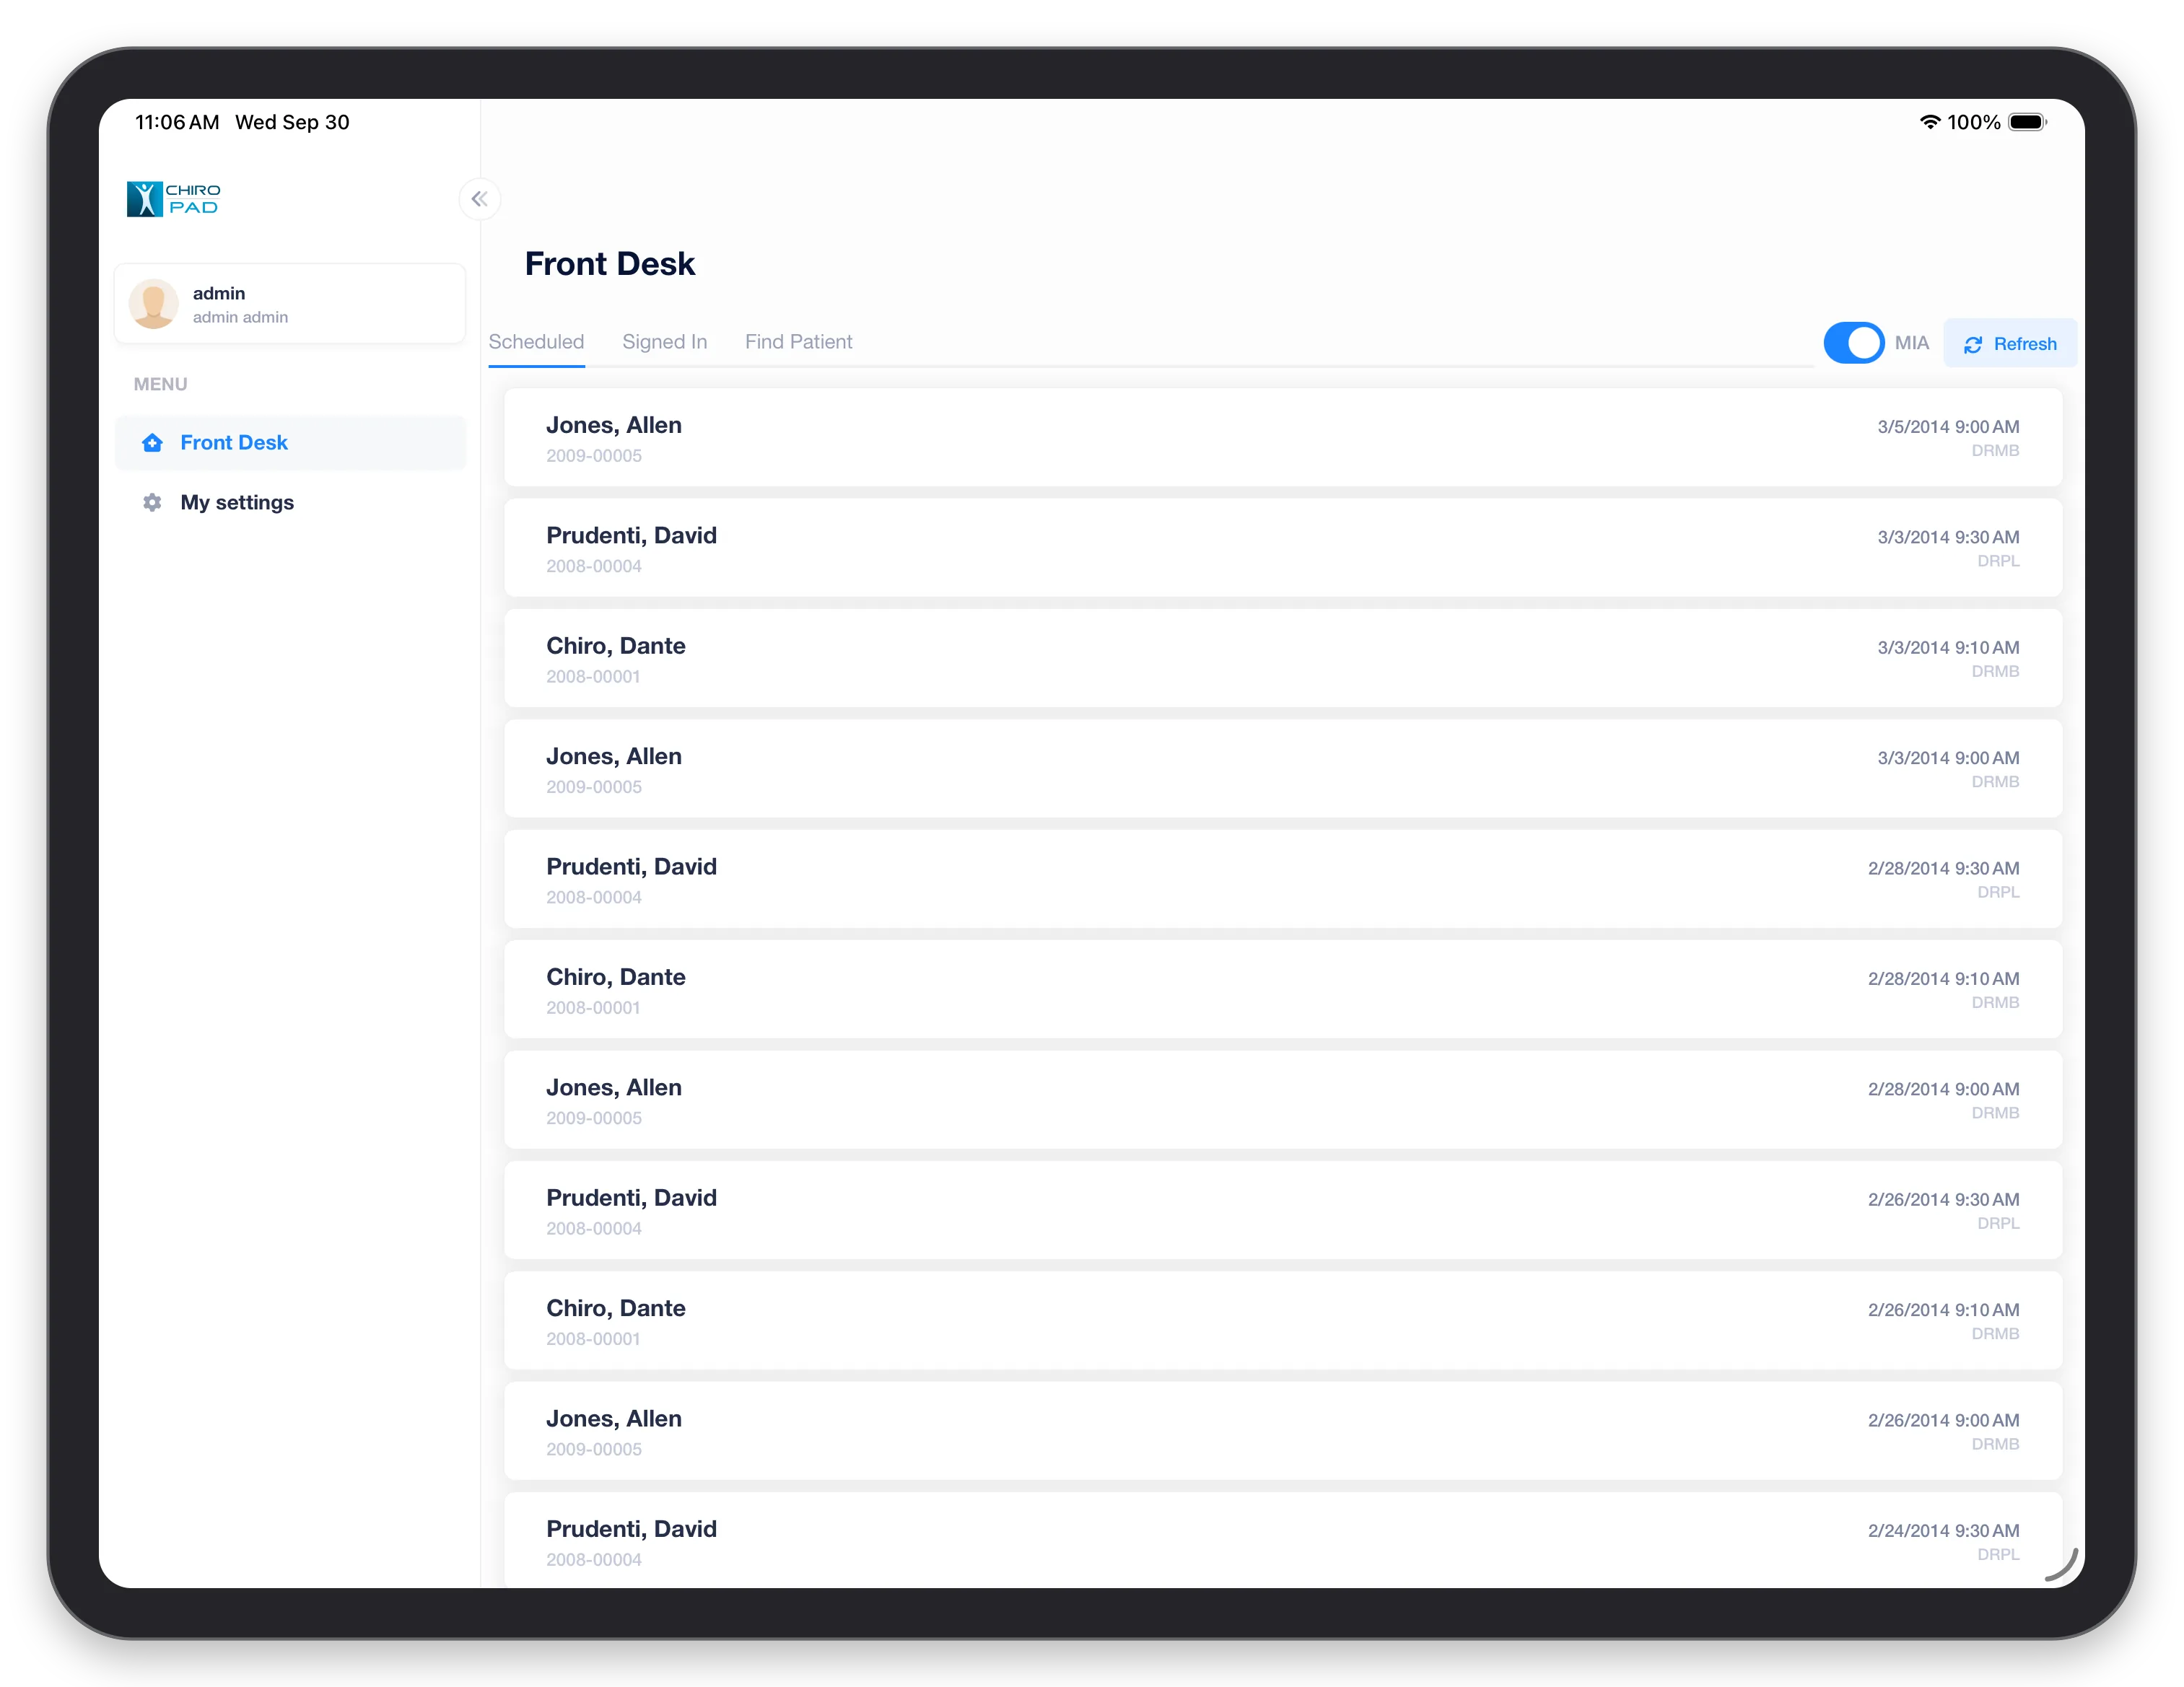
Three tabs across the top:
| Tab | Shows |
|---|---|
| Scheduled | The patients booked in the diary, with appointment date and time |
| Signed In | The patients who have arrived and been signed in |
| Find Patient | Search by name or chart number to open anyone else |
Each row shows the patient's name, their chart number underneath, and on the right the appointment time and the provider's code. Tap a row to open that patient.
- MIA — the switch at the top right turns the Scheduled list into the missed-appointments list: patients who booked and did not arrive. Turn it off to go back to the schedule.
- Refresh reloads the lists. Use it when the front desk has signed someone in from a workstation since you last looked.
For the full front-desk workflow in the web application, see Front Desk, Signing patients in and Missed appointments (MIA).
Patient Info
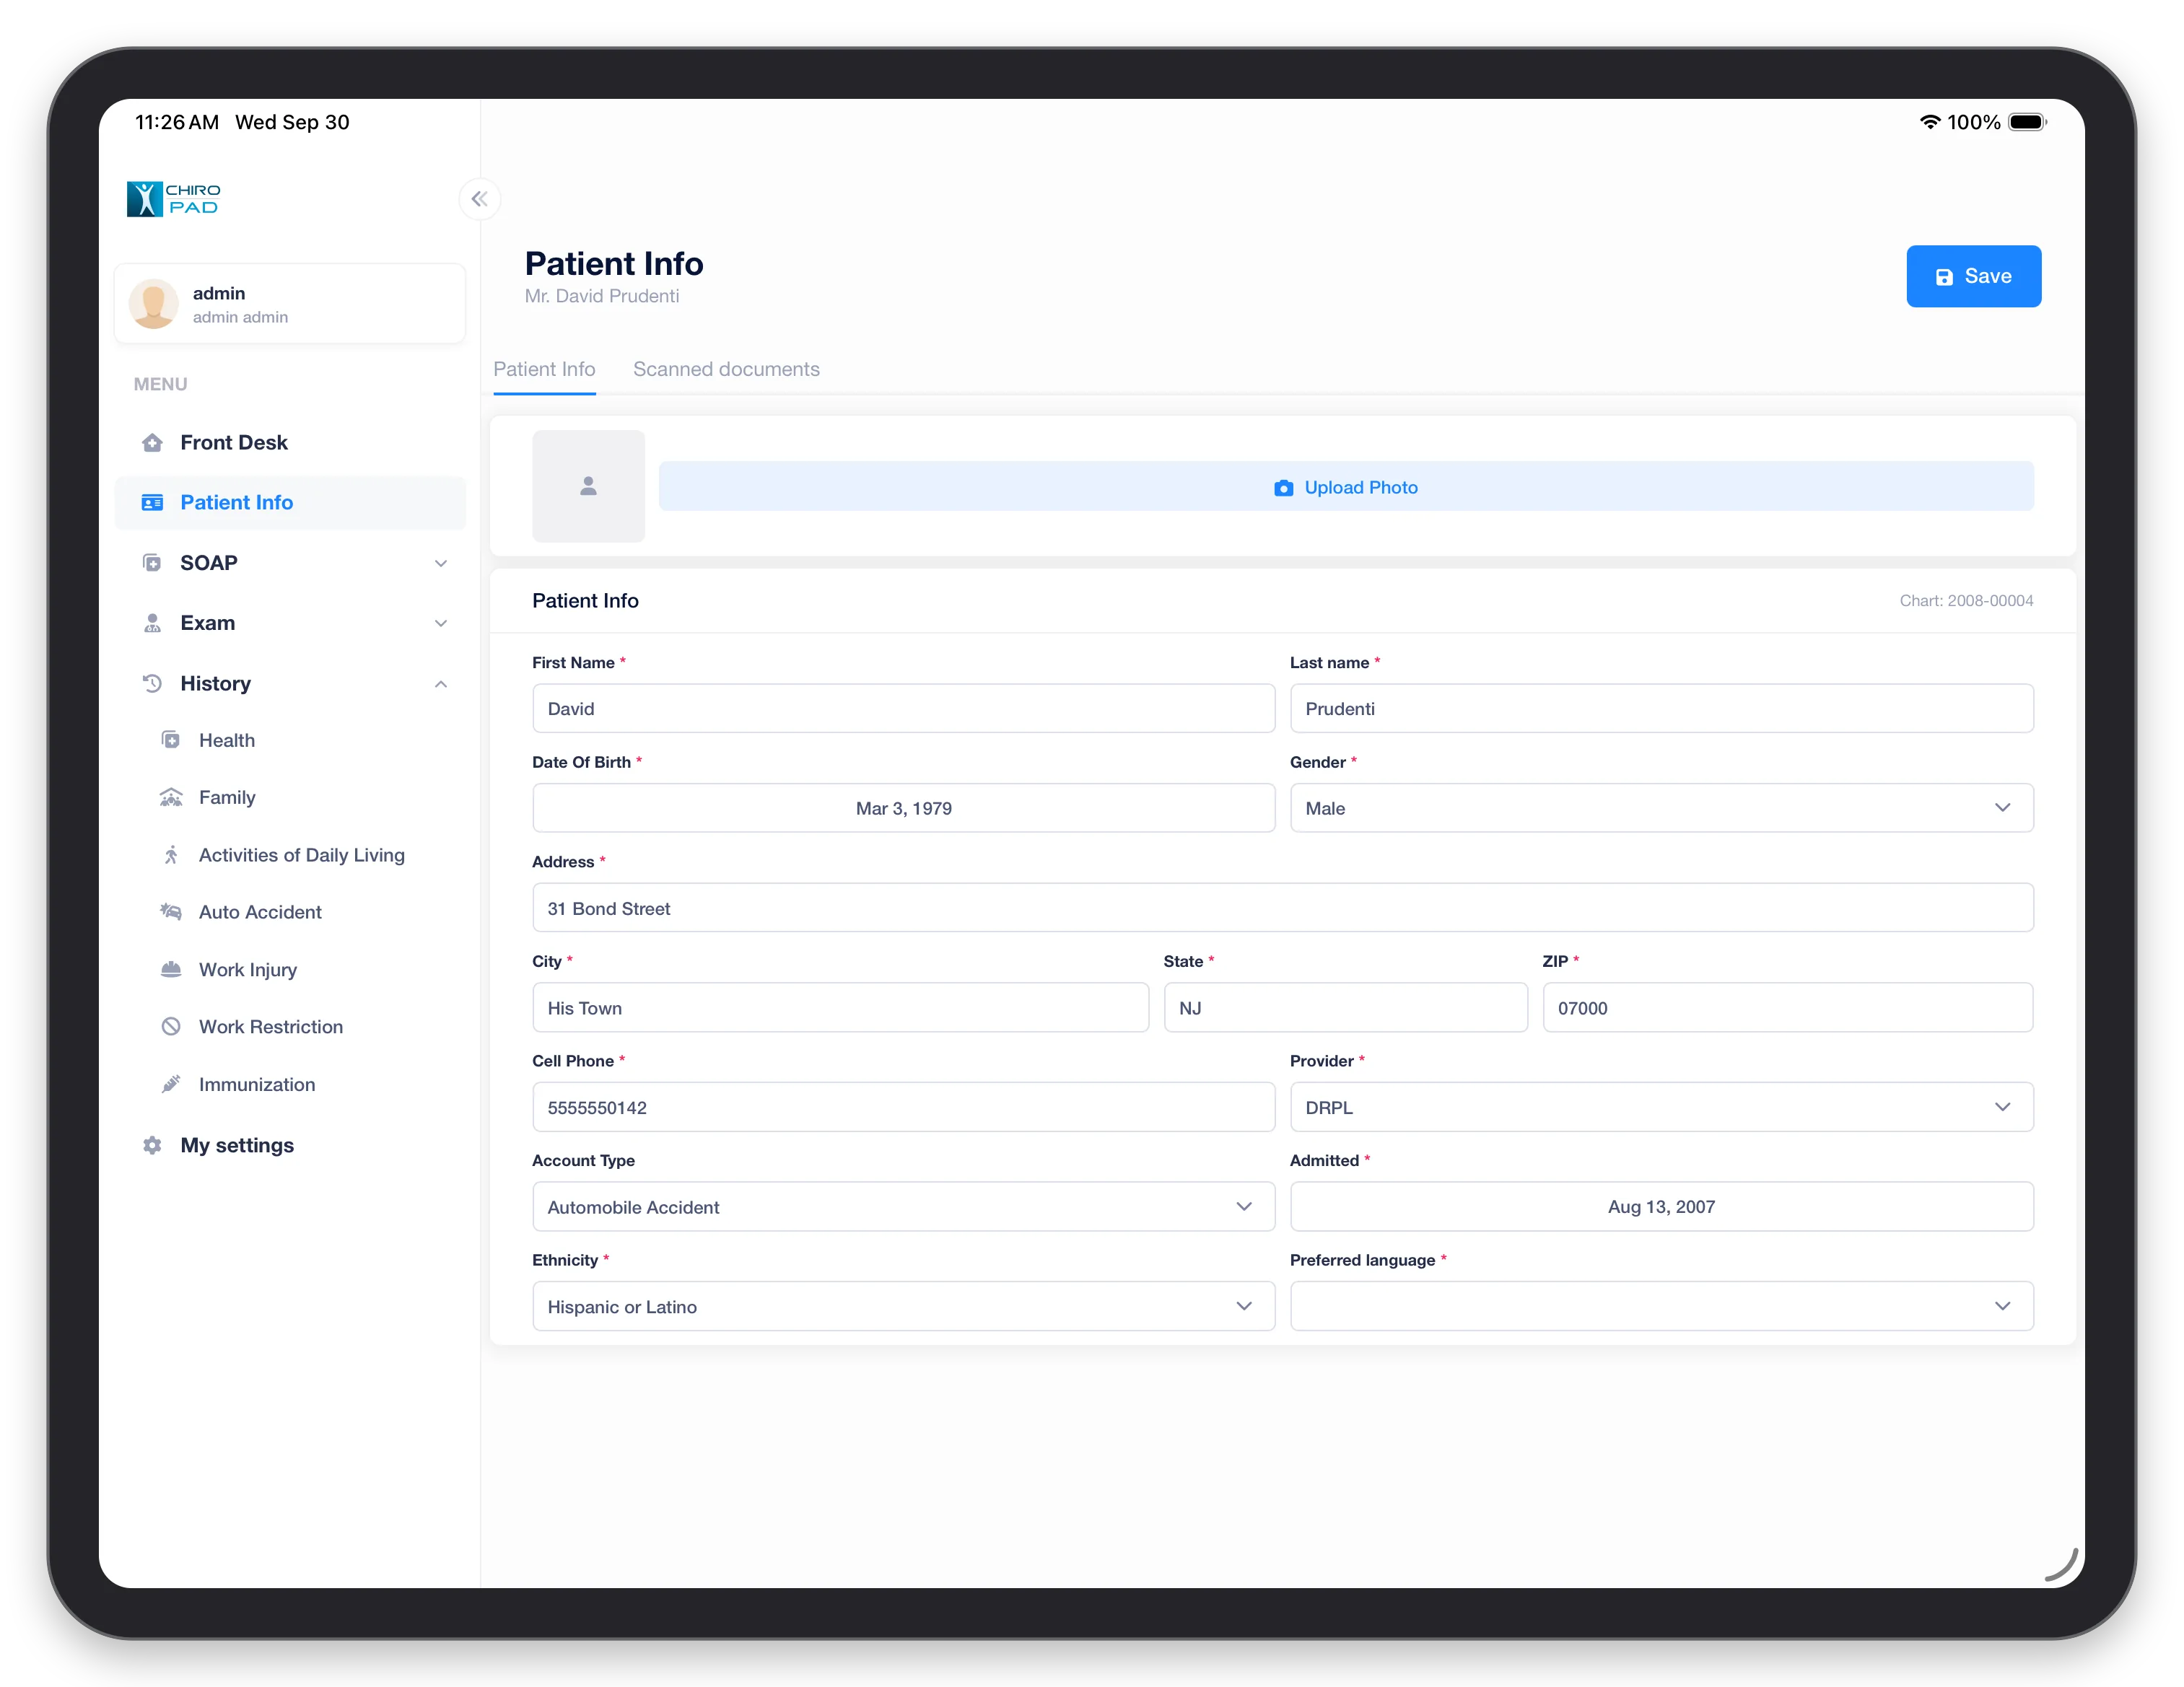
The patient's details, with their chart number at the top right of the form. Fields marked with a red asterisk are required before you can save.
- Upload Photo takes a picture with the tablet's camera, or picks one from its photo library, for the patient's record.
- The form covers name, date of birth, gender, address, cell phone, provider, account type, admitted date, ethnicity and preferred language.
- Scanned documents, the second tab, lists the documents scanned into the patient's record.
Tap Save to write the changes to the record. Everything else about a patient — policies, transactions, the ledger — stays in the web application: see Patient Info.