
Appearance
Signing patients in
Signing a patient in records that they have physically arrived in the office. Their name moves onto the Signed In Patient tab, where the whole practice — front desk and providers alike — can see who is waiting.
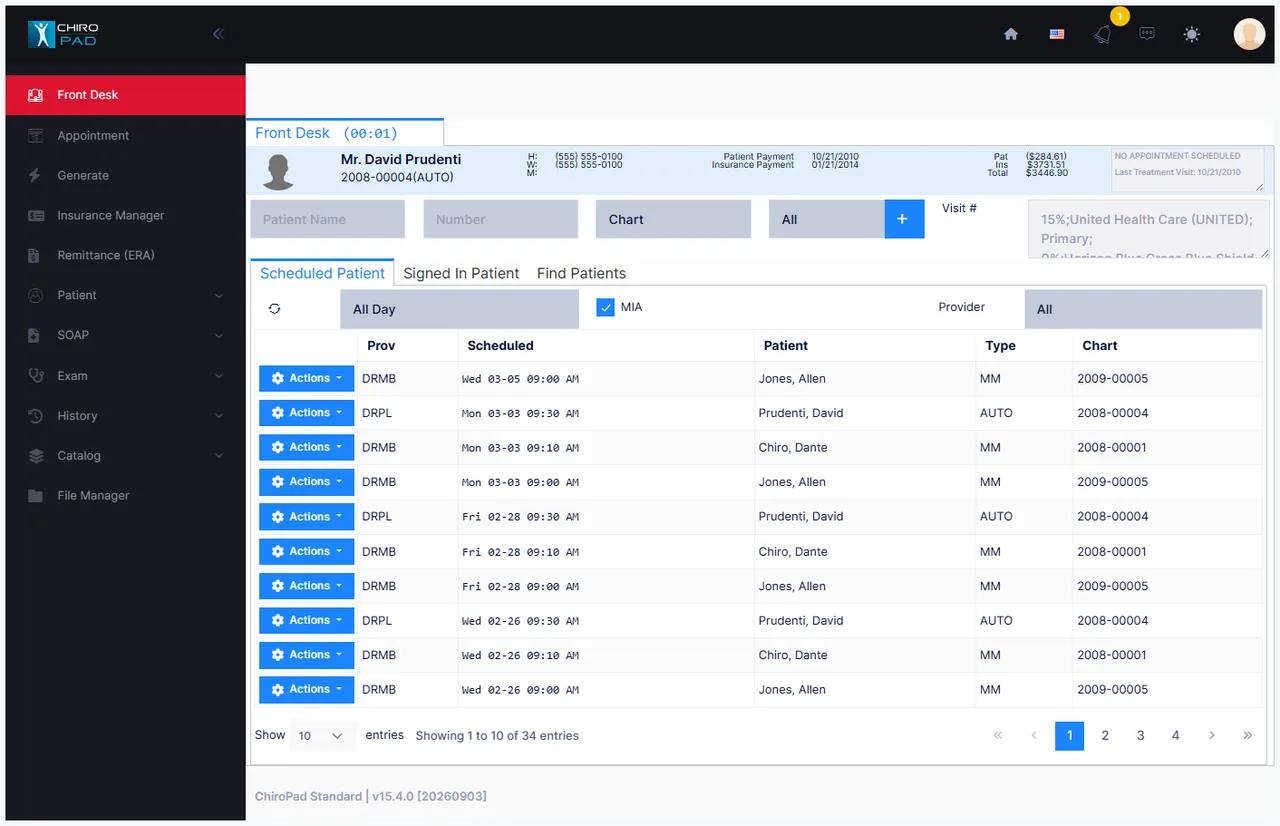
A patient with an appointment
- Go to the Scheduled Patient tab.
- Find the patient in the list.
- Open the row's Actions menu and choose Sign In.
The patient moves to the Signed In Patient tab, with their scheduled appointment time shown alongside.
A walk-in
A patient without an appointment today is not on the Scheduled Patient tab, so start by searching for them:
- Search for the patient by name or number — see Finding and opening patients.
- On the Find Patients tab, open the row's Actions menu and choose Sign In.
The patient appears on the Signed In Patient tab marked as a walk-in rather than showing a scheduled time, so it stays clear who was expected and who was not.
You don't need to open the file to sign someone in
Sign in straight from the search results. Only open the patient's file if you actually need something from it.
Correcting a mistaken sign-in
If you sign in the wrong patient, it is easily undone:
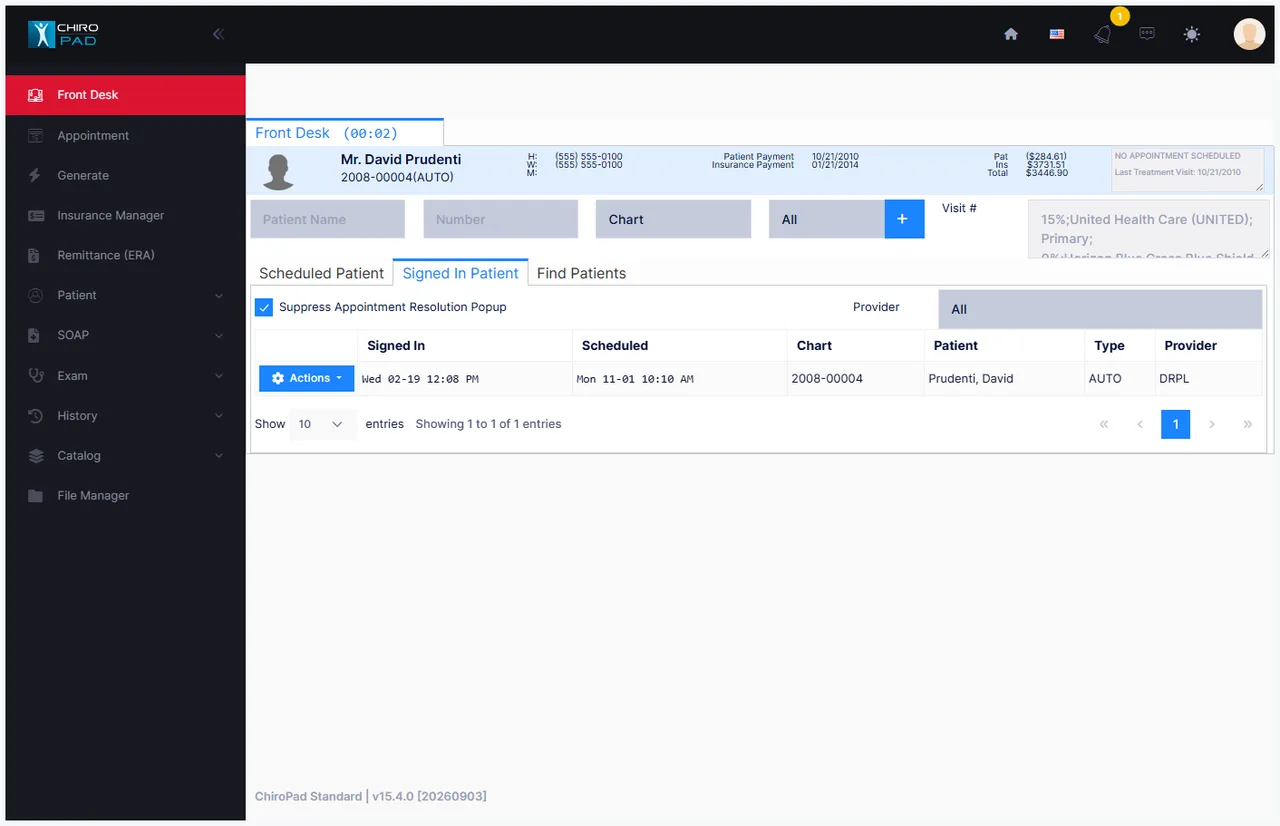
- Go to the Signed In Patient tab.
- Open that patient's Actions menu and choose Remove from sign in.
A patient who had an appointment returns to the Scheduled Patient tab. A walk-in simply drops off the list, since there was no appointment to return them to.
Keeping the list current
Several people are usually working from this screen at once. If you suspect the list is behind — someone was signed in at the front desk but you don't see them — use the Refresh button on the tab to pull the current list.
See Display options and filters for how to control what each workstation shows.